
Take 2…
Hi there
Thanks for popping in. Let’s plays TITS! They’re In The Sale! Hahaha ! That’s just too much. Ok . Let’s just plays ITS then… Moving on swiftly…
Thought I’d set myself a challenge: take the same Butterfly Tree stampset,

same Woodland masks set,

…and make two cards in 15 minutes. Start the clock!

I even managed to get my bloggy hat on, and take photos as I went! Here’s a quick step by step…
- Went with the little Bijou Card blanks… Stamp the Butterfly tree off the side with black Archival. Partial Art. Always hits the spot.
- Place the Pine Forest mask down randomly nearer the top of the card, and brush Bundled Sage Distress Oxide ink down off the mask.
- Replace the mask lower down and shift it along to use different trees. Use a Spot on Sponge to add Forest Moss Distress ink. Pounce for a real dark tree line in the front.


- Pick a moon from the Woodland mask set (ITS), and brush Tumbled Glass Distress ink across the sky, using the mask as a starting point. Spot on Sponge (ITS) to sharpen the edge and intensify.
- To add a little interest, drag the edge of a spreader tool or ruler across the ink pads, and bang down across the sky or the trees.
- Do the same with the White Picket Fence ink pad. Great pad.
- Bang a Fat white Posca pen across the side of your hand to get random painty white flicks.
- Pick a sticker from Barbs Collection (ITS), stick on a poly bag, frame with a black Sharpie pen, then add to the artwork.


Next one….
- Same starting place.
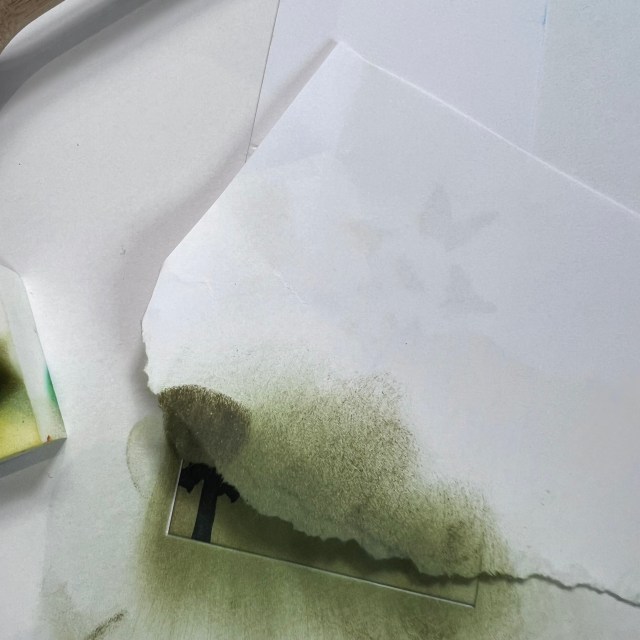
- Tear a piece of copy paper, and brush the same Bundled Sage ink pad into the hill area.
- Drop the torn paper and move across to use a different area. Brush the darker Forest Moss ink pad across that hill line.
- Move the paper down once more, then use a sponge again, to get a really dark, solid, opaque front line.


- There’s a super little stamp set, which I use A LOT. it’s this one: Stag Outline and Miniatures (ITS). Fabulous value! The deer are the perfect size. So are the trees. Anyway. Add the deer along the base.
- Add a large moon from the same Woodland mask Set, cover up the green hill with the other side of the torn hill, and add some Tumbled Glass sky with the same sponge (ITS)


- Add a few hillocks, using the same sponge, same ink colours, and the torn paper.
- Add a STICKER from the same Booklet (ITS)


Of course, you can leave the cards bijou, but I decided to go large, and frame them with a white 5×5 cardblank (NITS! Sorry. Card prices an issue. Working on a solution though). We can still get the Stencil Card at a fair price though, so that’s all ITS…CLICK HERE


Stop the clock! This ‘ere blog took a lot longer than the cards, that’s for sure! I want to get back on the Inky Landscape trail. I enjoy it. And if I’m not mistaken, you do too. Let me know. I have a hankering to explore landscapes again. And arty collages. Are you with me? If so, then start collecting the stuff I’m using. Stencil Brushes too (ITS). And the Infusion Papers and BOW WOB Papers. Look at the prices here…


Thanks for shopping in the Clarity Club Members’ Half Price Sale. Much appreciated . Even if the items aren’t half price, bear in mind you still get 10%, 12.5% or 15% discount on anything else, depending on how many clubs you are in. And now we have also fired up the Loyalty Points, so the more you spend, the more points you earn. Just to clarify, the points will be added to your account automatically, but only once we dispatch the order. Bear with us. We are not Amazon. We are Clarity. xxx
Love always,
Barb xxx
13 thoughts on “Take 2…”
What a wonderful instructive blog. Must have a go. See you in a few weeks, getting excited. Here come the judge!
I’m at my crop in the Village Hall on Saturday .. going to take my Clarity gear and get INKY!
Rock on …. playtime with BG !
I am enjoying the inky painty side at the moment. I have what I think is an old rubber stamp from Jayne Nestorenko, a mandala. I have just done six toppers so far, slightly differently coloured, which I intend to use as a set of notelets. Then I found a piece of card that had been used to die cut leaf shapes which is making a great stencil. I am just having fun! xxx
Love them. Thanks for the instructions. Take care.
What great projects – love how bijou grows into a bigger card. Need to go & check my stash, I know I have the fly away boy & girl but not sure about the tree stamp. So many ideas buzzing through my head – just need to make time to play. Did do a bit of printing with my gel press & BOW WOB papers this afternoon & a couple of stages following one Eileen Godwin’s projects. A bit like Groovi you have to be patient & allow the layers to dry !! Tomorrow I shall hopefully get back to them all for the next stages !!
Great Blog, Barb, and a couple of magic projects! Definitely with you on the inky Landscape trail and arty collages! Can’t wait to see where you take us! The Members Sale is so amazing, I may just be tempted to pop in again and top up my stash so I can join in with your next projects! 😄👍🏻
These are just fabulous! Love the creative arty style – and your step by step makes it look so simple! I’m going to have to get my masks out….
Great blog…..will definitely be having a go at this when I get back home.
Too right you are not Amazon – I cancelled my Amazon account years ago (not an easy thing, do you know anyone else who has successfully cancelled them? – had to go via the Caribbean!!).
Anyway, back to stamping, I have the bird tree instead of the butterfly tree, playtime I think (whilst it’s raining!) Did my sale order at the first opportunity, no rush, I know it is all worth waiting for. Thank you Clarity.
Love
Maggie (York UK)
PS – please remind me how much I can use my points for, I’ve lost track! Are 100 points = 10p?
Hi Barb, a great step by step blog, love the images you have created and am going to try replicate. Need to go back to the sale. Take care everyone. Bx
I think that butterfly tree stamp is my all time favourite, along with the alliums! Great cards x
Great blog.
I am about to spend a few hours browsing the sale, feet up, coffee at hand. Lovely way to spend the afternoon (and some money !!!!! )
Love them cannot wait to get home as out of data here ,so I can check what I want x